
How to import Meta Ads campaign data into Google Analytics
Google Analytics quietly shipped a native Meta Ads integration. Here’s what it does, why it matters for your reporting, and exactly how to connect it — step by step.
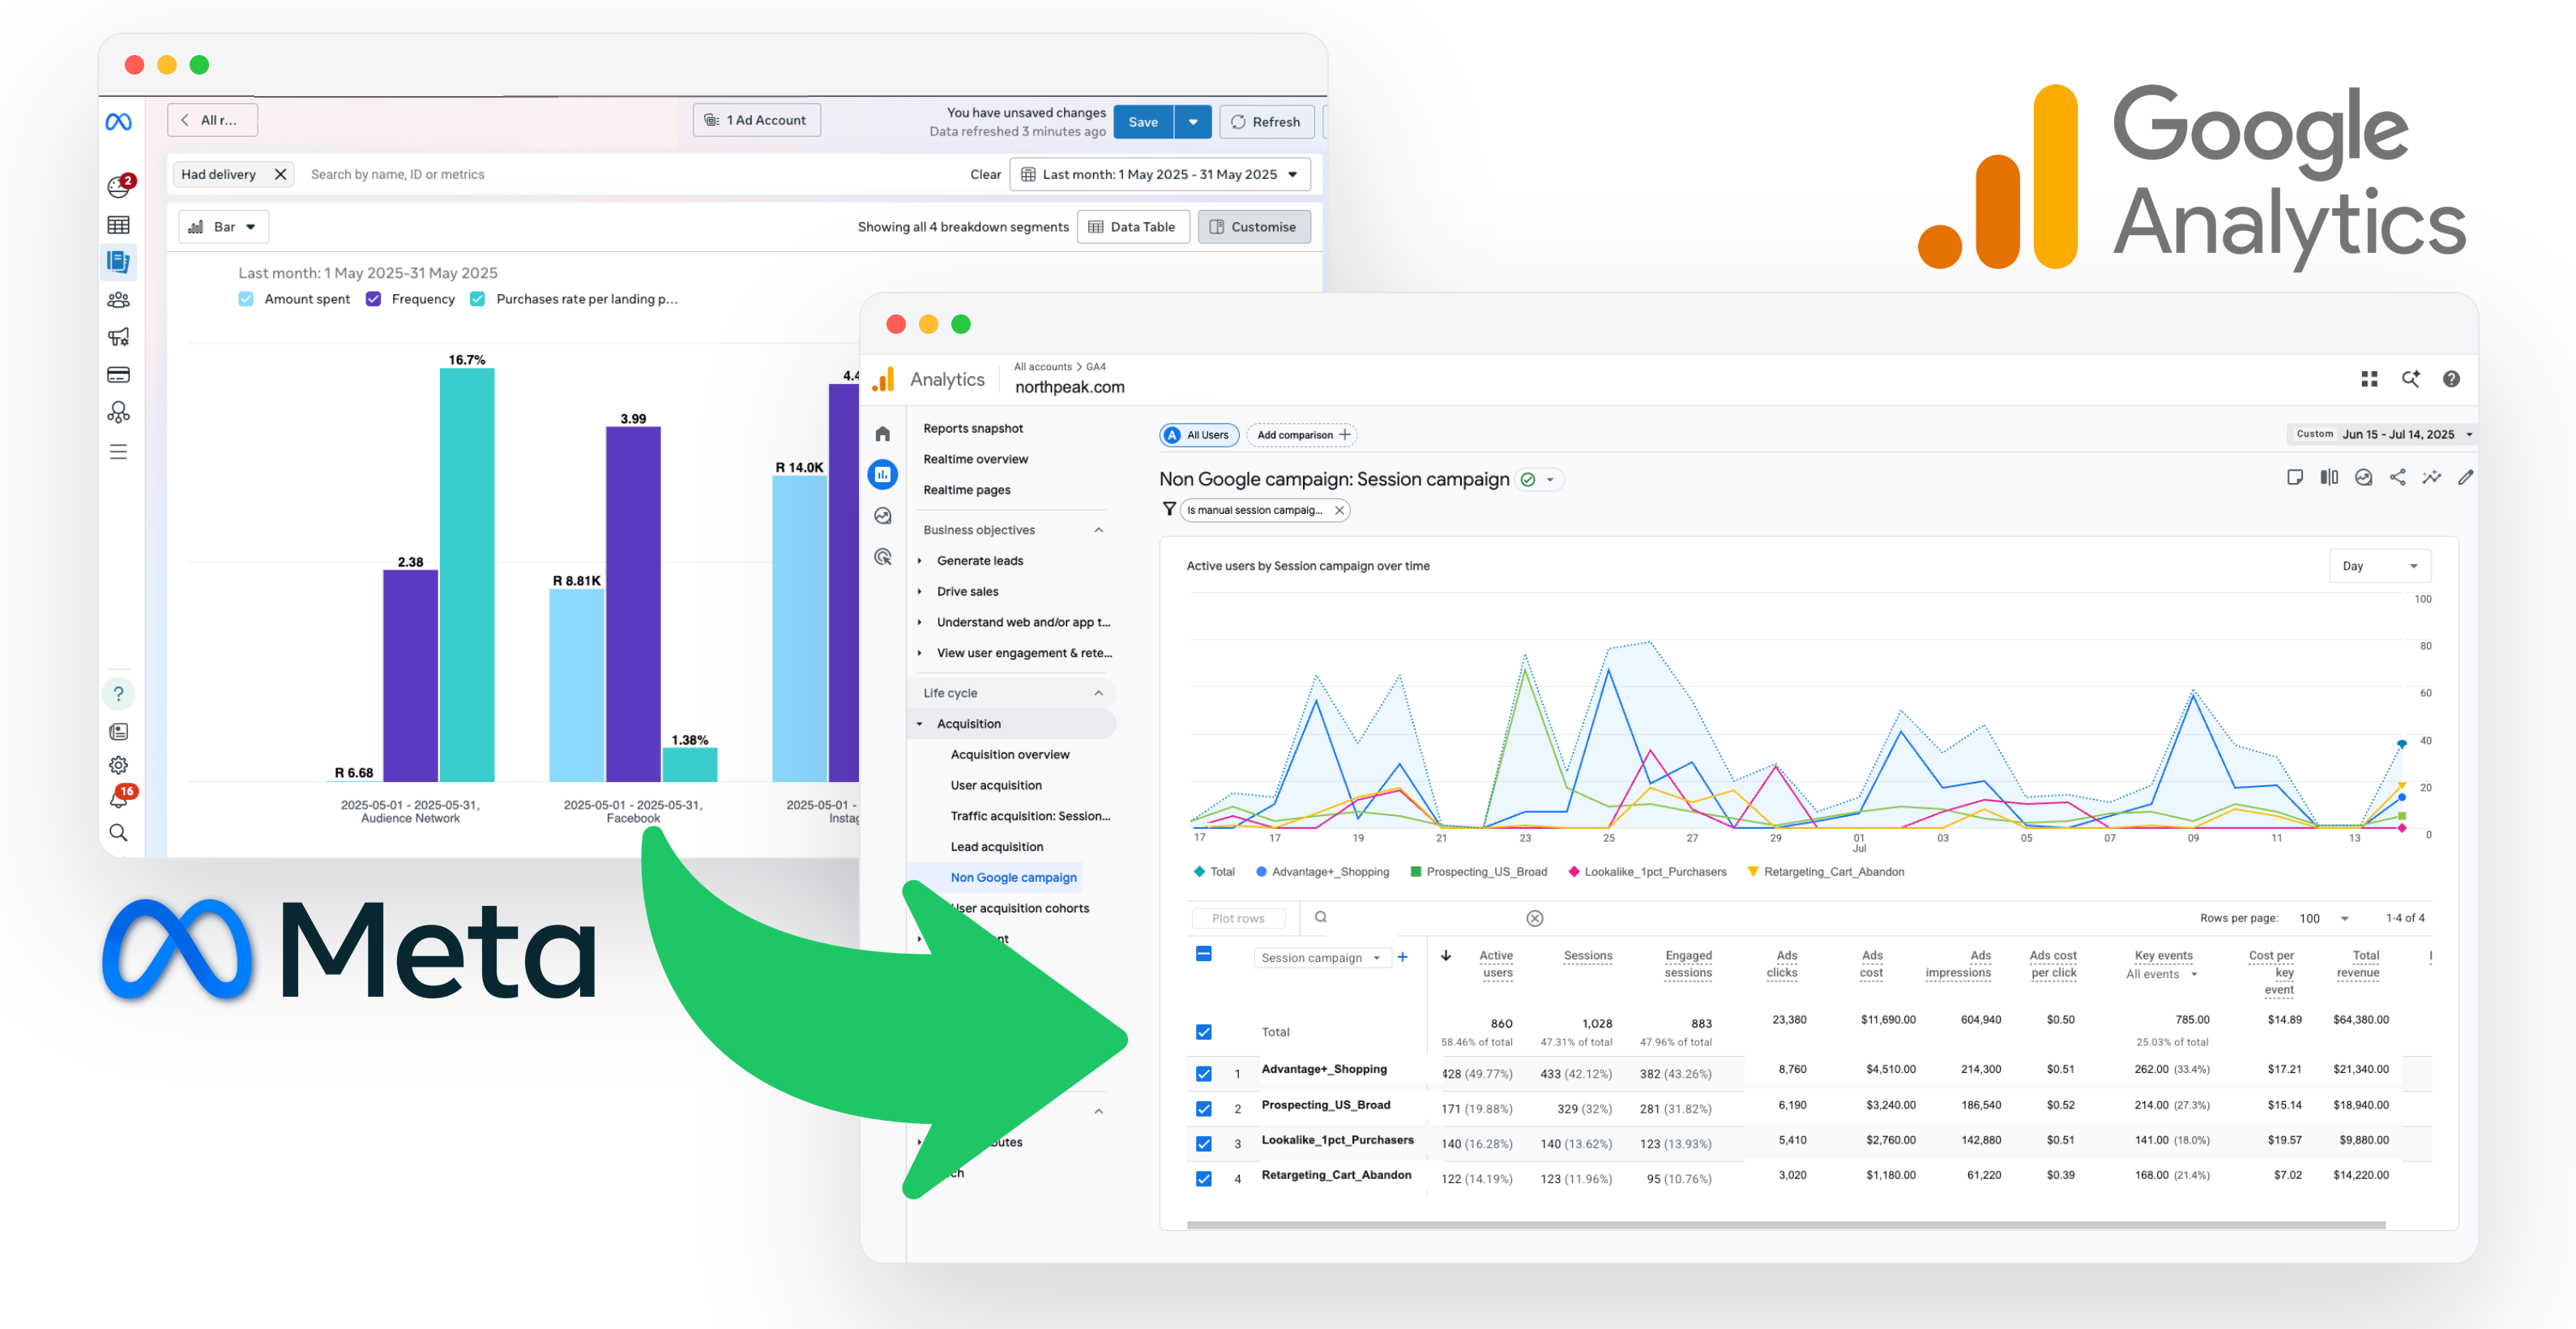
Once the connection is live, your Meta campaigns show up in GA4 next to sessions, key events and revenue, so ROAS is one report away.
For years, marketers have had to stitch paid-social performance and website behaviour together by hand. That meant exporting CSVs from Meta Ads Manager, pasting them into spreadsheets, and hoping the UTMs matched. Google Analytics just made that unnecessary, for free.
What’s new
Google Analytics now offers a native Meta data import, tucked under Admin → Data collection and modification → Data import. It pulls cost, click and impression data straight from your Facebook, Instagram, Messenger and Audience Network campaigns and merges it into GA4 through your UTM parameters, with no CSV exports and no third-party connector.
The integration is free, currently labelled Beta inside GA, and can backfill up to two years of historical Meta data on the first sync.
The problem it solves
Paid-social numbers live in Meta Ads Manager. Conversions and revenue live in GA4. To calculate true return on ad spend you’ve had to bridge the two by hand, and that comes with real costs:
- Data silos. Spend never sits next to the sessions, key events and revenue it actually produced.
- Manual work. Weekly CSV exports and VLOOKUPs are slow and error-prone.
- Fragile matching. One inconsistent UTM and your Meta cost lands in “(not set)”.
- Extra tooling. Third-party connectors solve it, but only for a recurring fee.
The benefit
With the import live, Meta cost data lands directly in your GA4 property and is joined to your website events. That gives you a unified view of paid search and paid social in one place, and unlocks a few things immediately:
- Real ROAS in GA4. Cost, clicks and impressions sit beside conversions and revenue in the reports you already use.
- One source of truth. Compare Meta campaigns against Google Ads and every other channel in the same interface.
- No platform switching. Answer “which Meta campaign drove the most revenue?” without leaving Analytics.
- Safe and reversible. Imported cost data can be deleted at any time without touching your event data.
“Bringing paid-social cost into GA4 turns ‘how did the campaign do?’ from a two-tab spreadsheet exercise into a single report.” — Marcus Feldmann, Head of Growth
Before you start
Three things need to be in place before the connection will work:
- GA access. You need Editor or Administrator permission on the GA4 property.
- Meta access. You need access to the Meta Ad Account inside the Business Portfolio that runs your ads.
- UTM tagging. Your Meta ads must already carry
utm_sourceandutm_mediumtags, since that’s how GA matches the imported cost to your traffic.
How to set it up
The whole flow takes about five minutes.
1. Open Data import in GA Admin
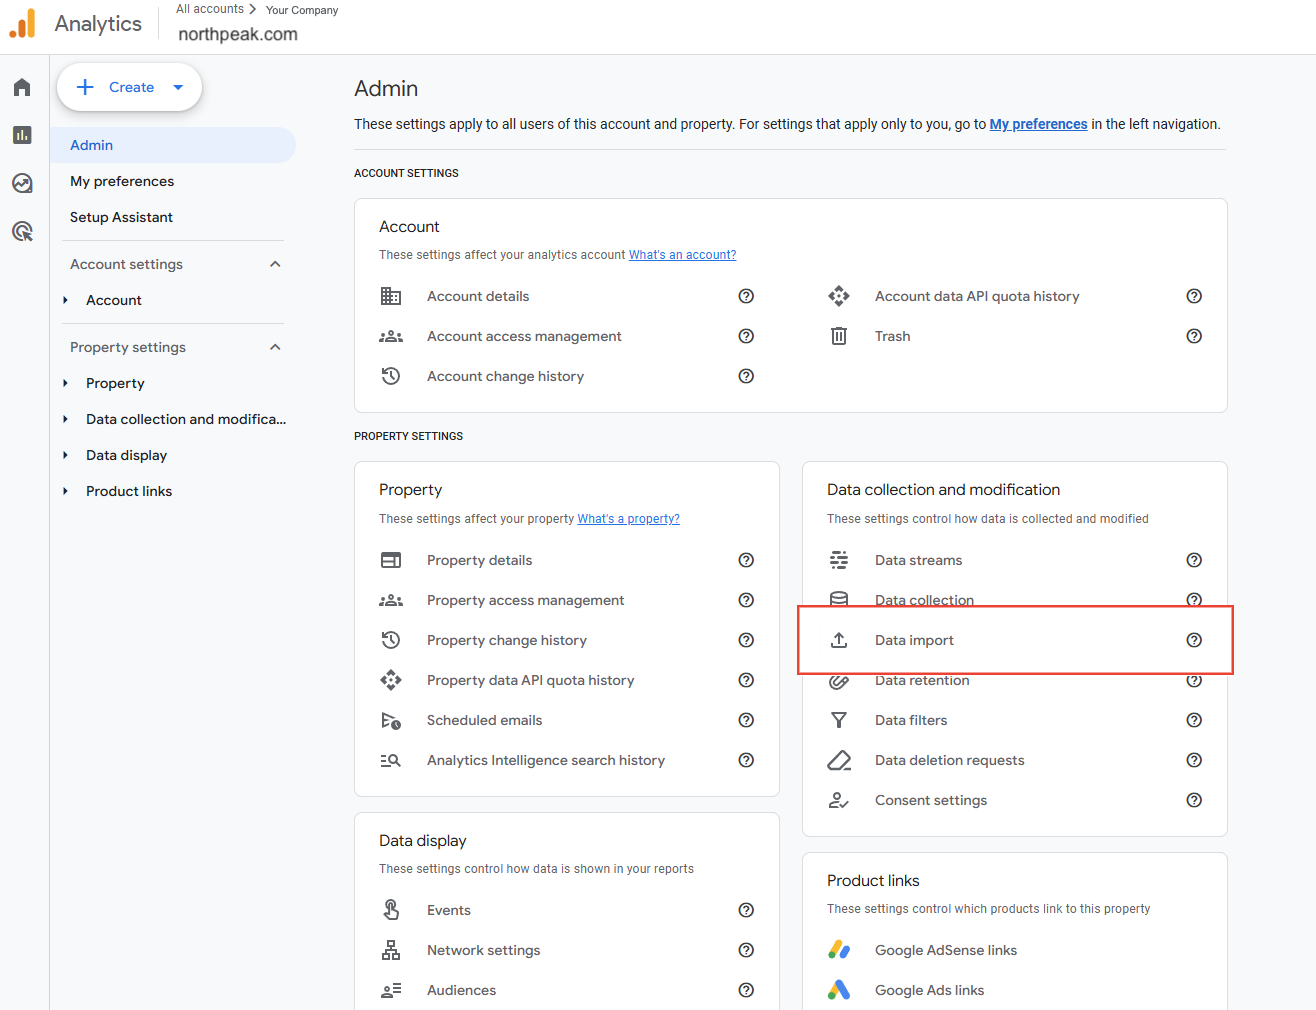
In Google Analytics, go to Admin, then under Data collection and modification click Data import.
2. Create a new data source
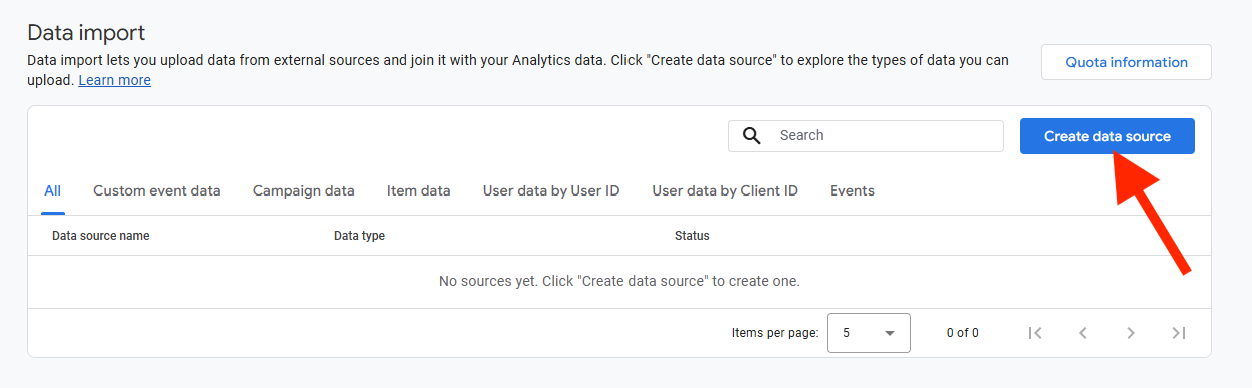
On the Data import screen, click Create data source.
3. Choose Campaign data and select Meta
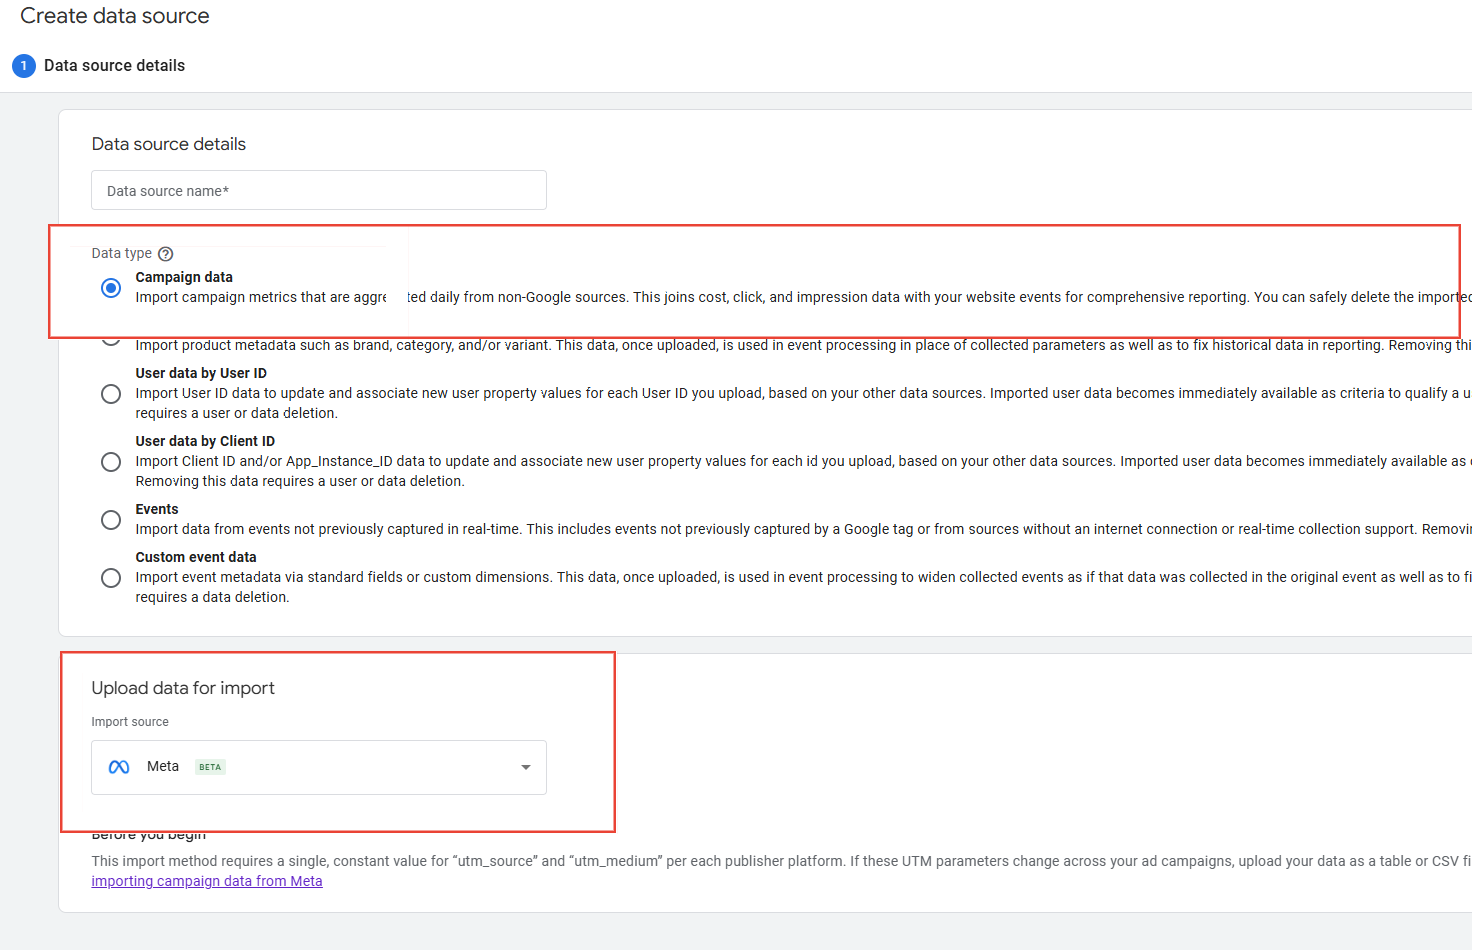
Give the source a name (for example Meta Ads), set the Data type to Campaign data, then choose Meta as the import source.
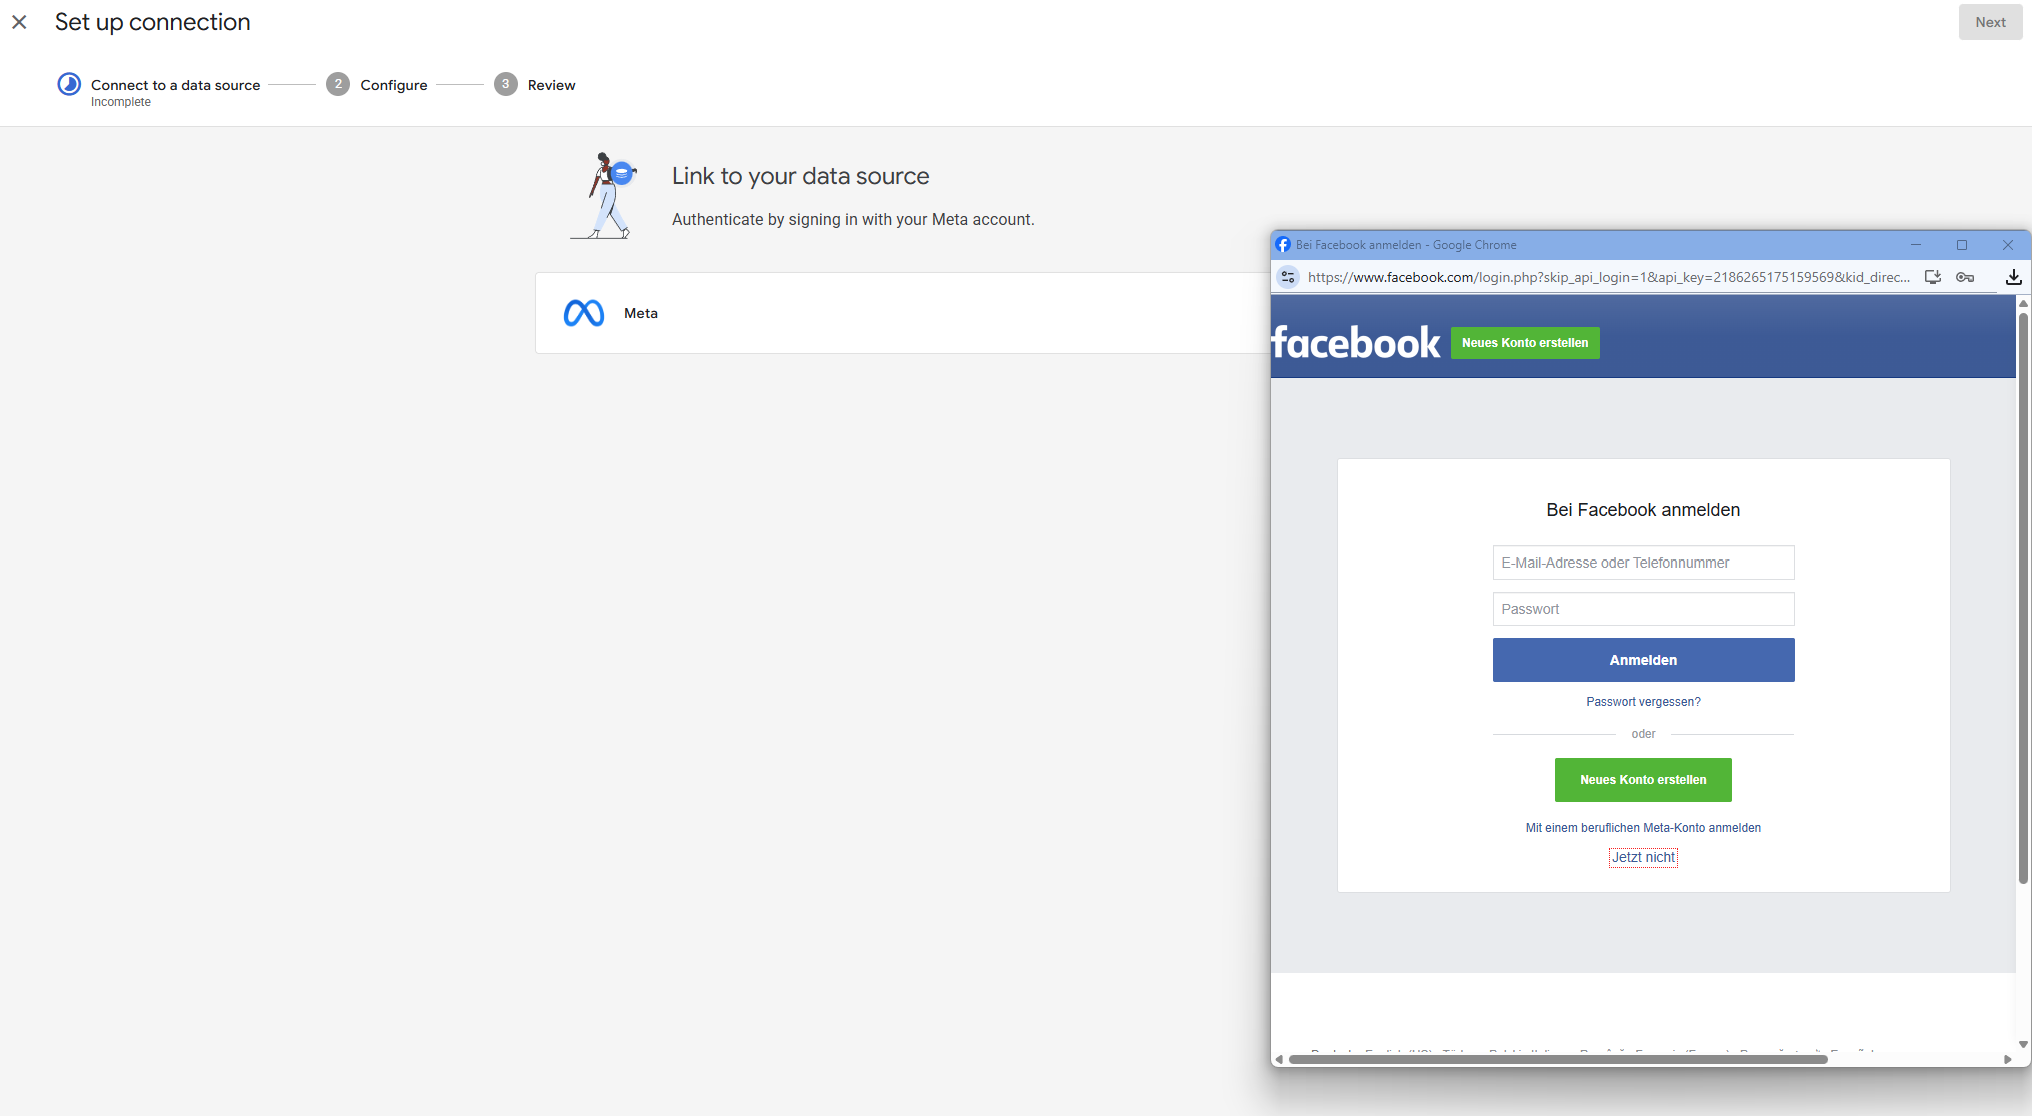
4. Authenticate with your Meta account
Analytics opens a Meta sign-in window. Log in with the account that has access to your ad portfolio.
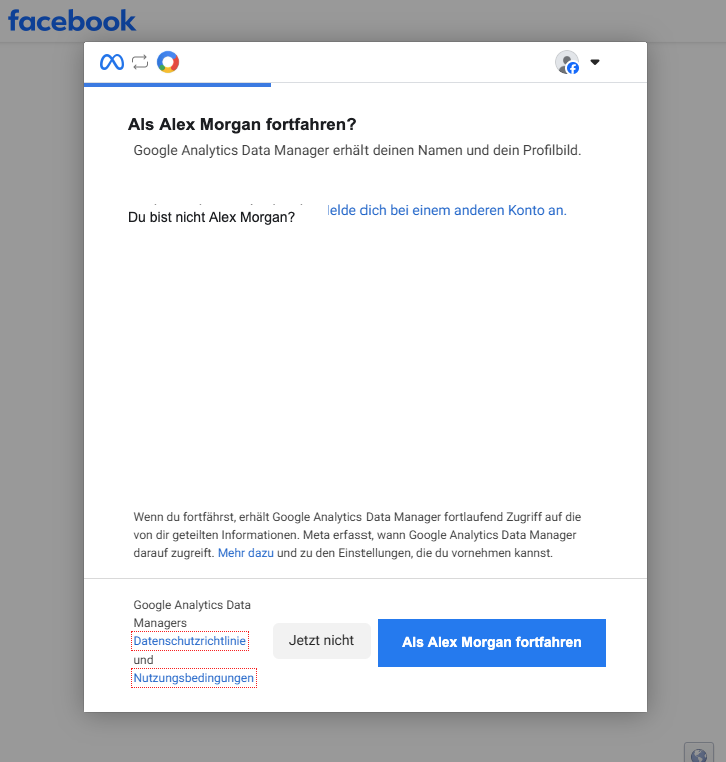
5. Continue with your Meta profile
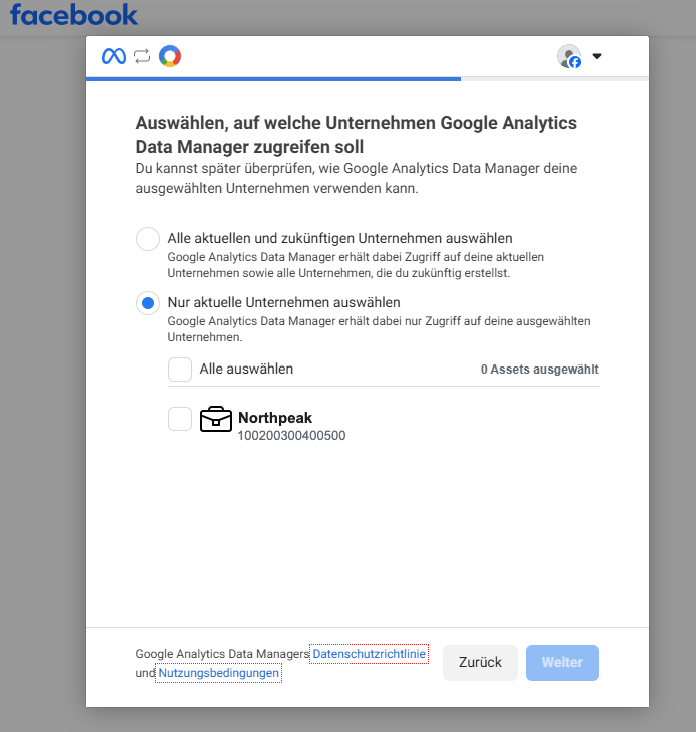
6. Choose the business portfolio to share
Select only the current business and tick the portfolio that runs your Meta ads.
7. Review and grant access
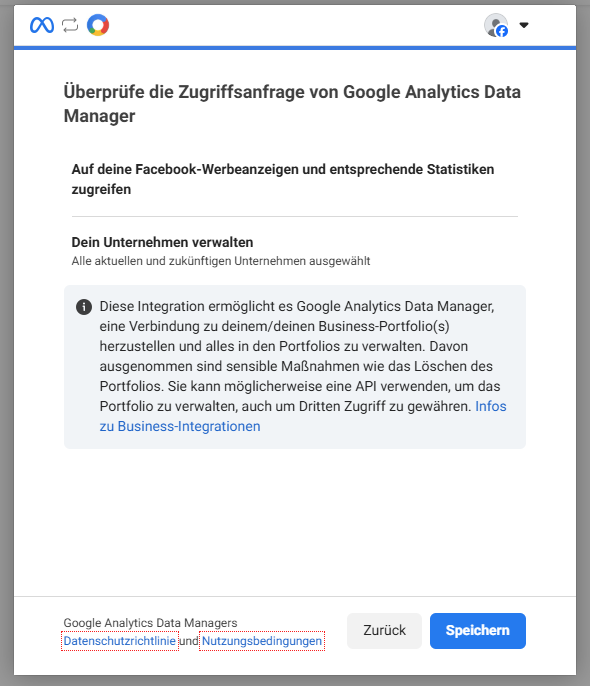
8. Confirm the connection
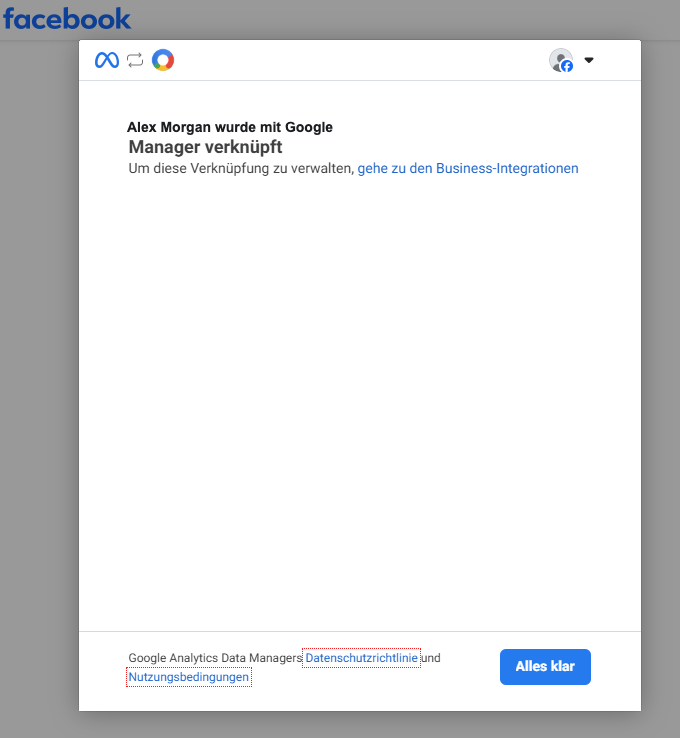
9. Map your UTM parameters
Back in Analytics, pick the Meta Business Center and Ad Account, then map the utm_source value for each platform and the shared utm_medium.
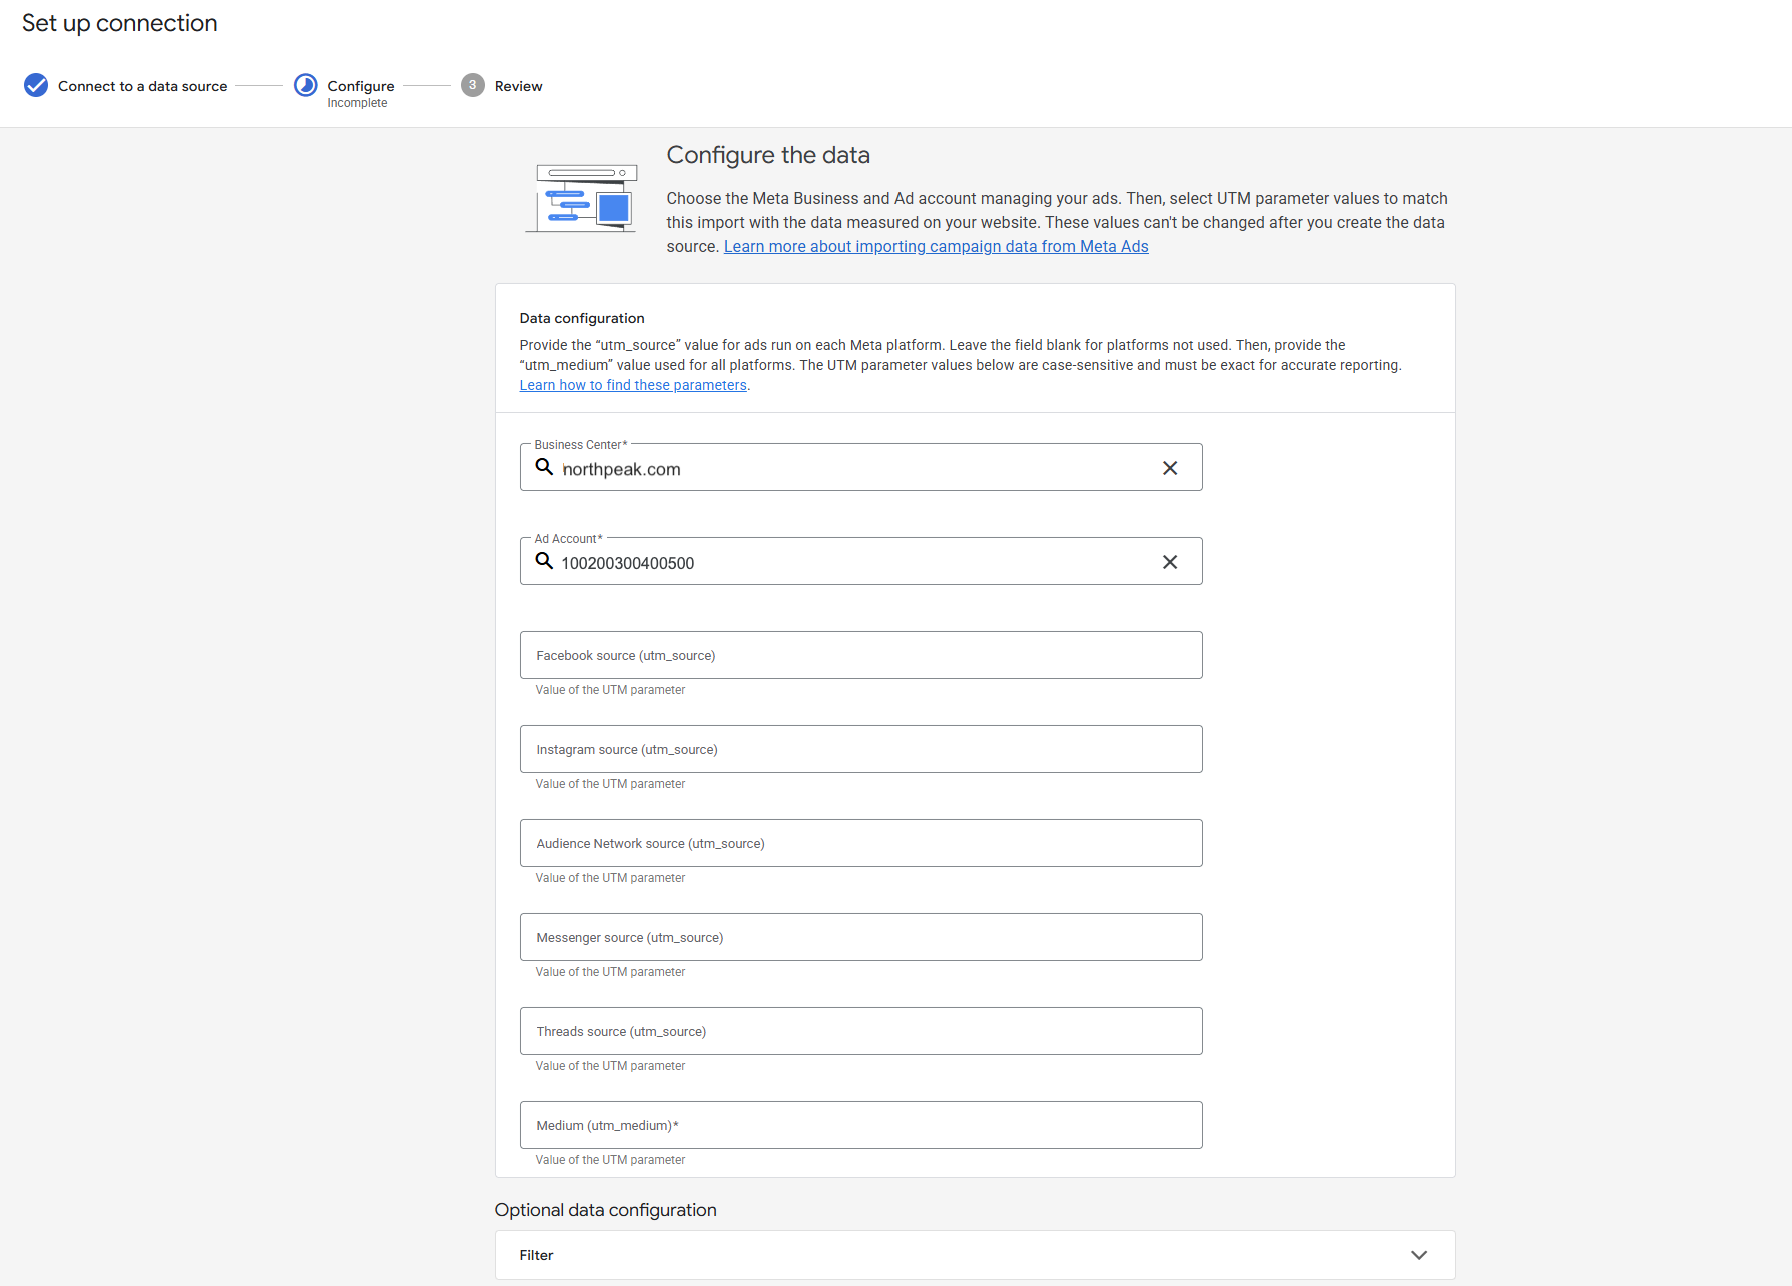
This step is the one to get right. The UTM values are case-sensitive and must exactly match the tags on your live Meta ad links, and they can’t be changed after the source is created. If you use Meta’s dynamic site-source tag, it resolves to fb, ig, an and msg; a common medium is paid. Check the exact values under Build a URL parameter in Ads Manager.
Avoid double-counting. Because the first import can pull up to 24 months of history, delete any overlapping cost datasets you’ve uploaded previously before you finish, otherwise the same spend can be counted twice. Imports can take up to 30 minutes to run, and up to 24 hours before data is fully available.
What it looks like in GA
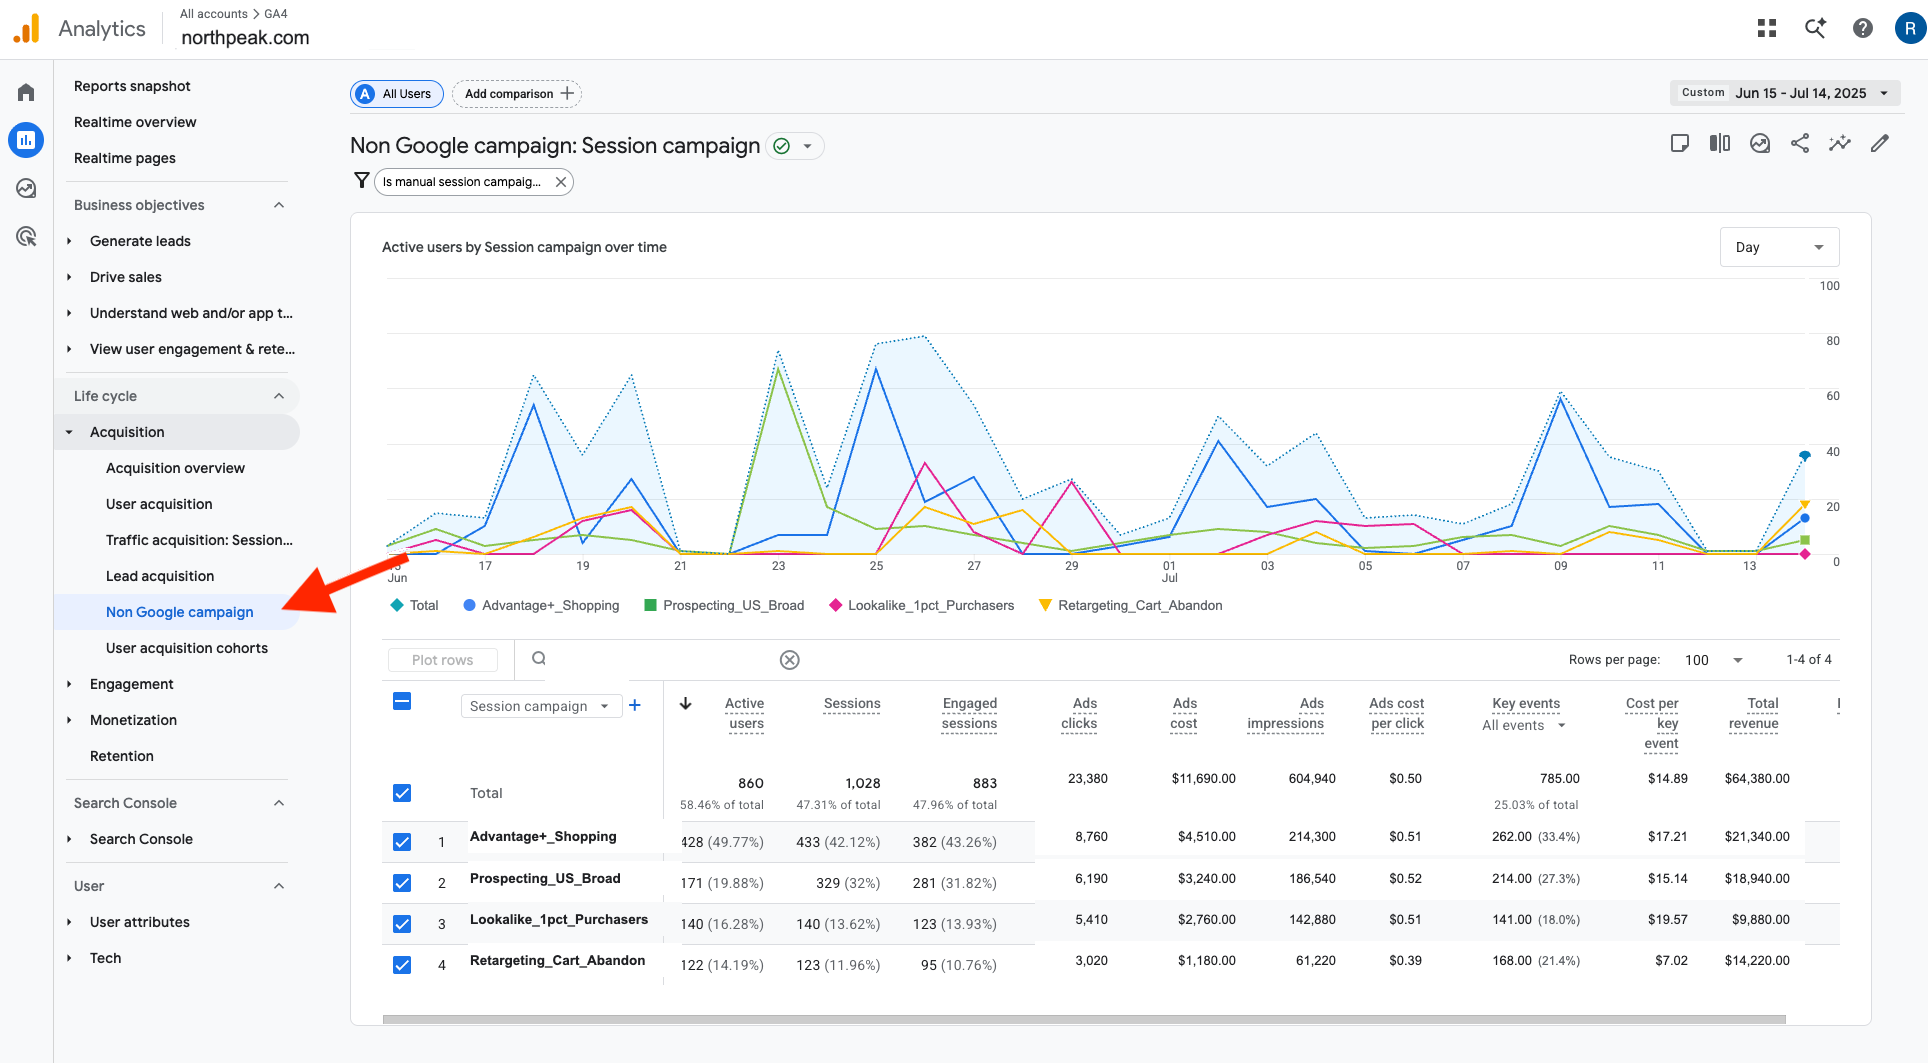
After the first sync, your Meta campaigns appear wherever you use the Session campaign and Session source / medium dimensions. The quickest place to check is the Non-Google cost report under Reports → Acquisition; for deeper analysis, build an Exploration to combine cost with key events and revenue. ROAS then falls out for free:
Best practices we’ve learned
- Standardise your UTMs first. Lock down one
utm_sourceper platform and a singleutm_mediumbefore you connect, so the import can reconcile your tags. - Match case exactly.
Facebookandfacebookare two different sources to GA. - Use a filter if you need to. You can scope the import to specific campaigns rather than the whole account.
- Give it time. Historical backfills are slow, so don’t panic if the numbers aren’t there within the hour.
- Visualise across channels. Once Meta cost is in GA4, a Looker Studio dashboard makes spend, clicks and conversions comparable across every channel.
See the keywords behind every conversion
Meta cost in GA4 shows you which campaigns pay off. Keyword Hero shows you the “(not provided)” keywords driving your organic conversions, so every channel is finally measurable.
Try Keyword Hero free